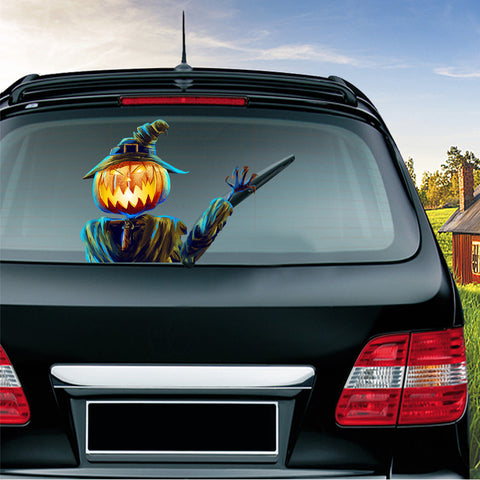
🤩These awesome, creepy and entertaining designs are sure to turn heads and get people in the mood for Halloween or all year round.😈

🥳Features
- Universal size for most rear wipers
- Resistant to all weather conditions in sun, snow and rain.
- Neatly detachable and removable
🥳Installation
- Thoroughly clean and dry rear window and wiper
- Attach a leg to the squeegee according to the instructions on the package. You can adjust it slightly to the left or right as needed.
- Before removing the back of the decal, aim it at the best side of the wiper for positioning. The leg will work fine on both sides. If necessary, you can trim the decal to fit around the wiper arm if yours is mounted through the window.
- Remove the backing from the decal, align the decal with as little adhesive as possible, and carefully place the decal from the bottom onto the window pane, pushing up any wrinkles. Remove the decal and reapply if necessary, taking care not to tear it.
- Then use a credit card or something thin and pliable to push out any creases or air bubbles.
- Keep your wiper blades free of dirt and debris to get the most out of your decal. Remove the WiperTag arm before entering a car wash.
- To remove the sticker, make sure it does not freeze or it may tear. Remove it indoors, heat it with a hair dryer or heat the inside of your vehicle. Make sure your hands, the glass and the decal are clean and dry. Just take one edge and pull it off slowly. Then apply it back to the original paper. Remove the WiperTag arm by tilting it sideways and unlocking it. The number of times the sticker can be reused depends on how well it is cared for.

**If your windshield wiper is mounted on top, the sticker will be upside down, which is actually still very cool. Windshield wipers mounted under the window may not create the same desired effect.

🥳Package Includes